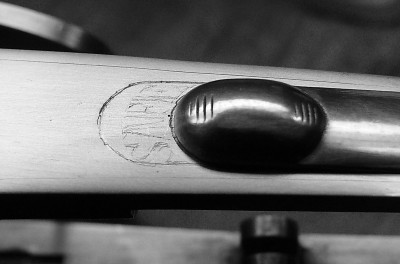
 1.The letters are marked out lightly in the correct position on the top tang, making sure that the safety catch covers it completely when pushed forwards.
 2.The letters are first engraved and then deepened further so there is plenty of depth for the gold.
 3. Next, each letter is undercut so that the bottom of the cut is wider than the top.This is necessary so that the gold will 'key' into the cuts and be held firm.Without this step, the gold would not be secure and may well fall out at a later date.Good deep undercuts are absolutely essential.
 4. The gold is then hammered in with a punch. Often various diameters of 24 carat gold wire is used. The punches can be brass or nickel silver, which being softer than steel will not mark the steel surrounding the inlay.
 5. When complete, the whole area is hammered well to ensure that the gold has spread into the farthest corners of each letter.
 6.Using progressively finer grades of abrasive paper, the excess gold is removed and the whole area smoothed until free of any blemishes. This is the point that the engraver holds his or her breath as it is only now that the quality of the job can be assessed.
 7. A quick application of gun blue reveals any faults in the lettering, and highlights where any modifications/corrections need to be made.
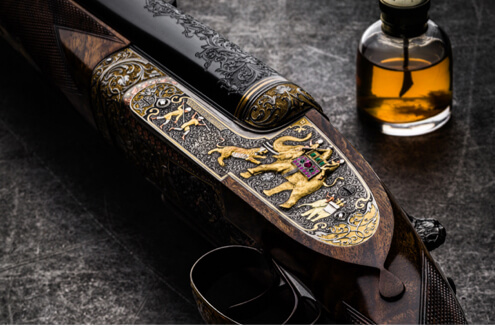
8.The steel around the area of the inlay is gently relieved to improve contrast and also to remove the possibility of unsightly wear underneath the safety catch when in use.After a little final fettling and polishing, the job is done !
Next time you handle a gun , why not pause for a moment to consider the work involved in this this tiny work of art under your thumb.
A Guest Post by Peter Spode. Peter has been engraving Westley Richards for 27 years. Please vote for Peter to win the deluxe book by posting a comment below!
This is the first "guest post" I have used which was sent in response to my earlier post to win a limited edition book by submitting your posts! Send to theexplora@westleyrichards.co.uk









Chris Davison on June 27, 2014 at 3:35 am
Excellent work Peter!!!
Jeff Powers on June 27, 2014 at 9:44 am
As I'm not an engraver I've wondered exactly how the gold was inlaid. Beautiful work and a great post.
steve bodio on June 30, 2014 at 5:54 pm
Once the great engraver Winston Churchill showed me how he undercut the steel to hold gold inlays, in the case he was showing me a Woodcock.
But it never consciously occurred to me that deceptively simple things like the gold in safeties also took so much hand- finishing and time.
Please keep up these explanatory features!
Hasan URGANAEV on July 5, 2014 at 2:38 pm
The great master, great work!! Admire his work! Super!
The Westley Richards 2014 ‘In Pursuit of the Best Post’ Prize. | WordPress on June 4, 2015 at 6:10 pm
[…] Spode did 2 very nice posts ‘A tiny work of art’ and ‘How Long does it take to Engrave a gun’ Thank you […]
The Westley Richards 2014 ‘In Pursuit of the Best Post’ Prize. | Westley Richards on February 8, 2016 at 7:18 am
[…] Spode did 2 very nice posts ‘A tiny work of art’ and ‘How Long does it take to Engrave a gun’ Thank you […]